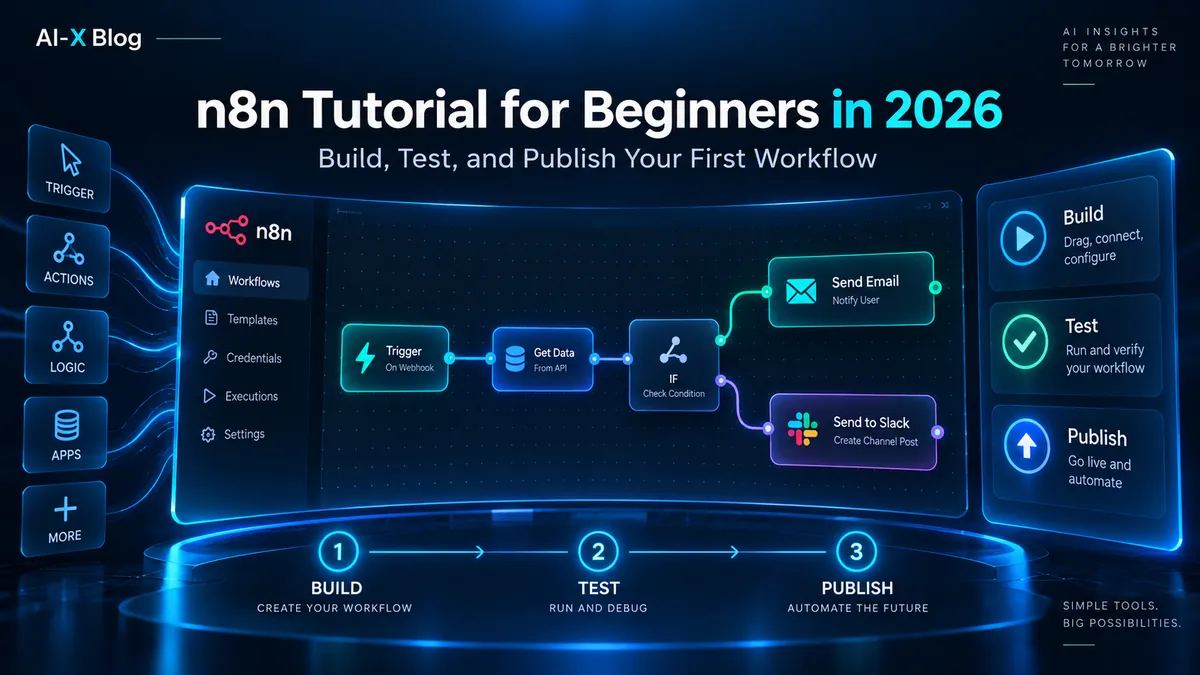
The fastest way to learn n8n is not to memorize nodes. It is to build one workflow, watch the data move through it, break it on purpose, and then make it safe enough to publish.
This n8n tutorial does exactly that. You will build a small webhook-based intake workflow that accepts JSON, normalizes the fields, validates the input, routes high-priority requests, and returns a structured HTTP response. The core version needs no paid API and no external app credential, so you can focus on how n8n actually works.
Then we will take the same workflow through the steps that beginner tutorials often skip: test vs production webhook URLs, execution history, pinned data, credentials, retries, an error workflow, authentication, data exposure, and a practical pre-production checklist.
Methodology: AI-XBlog verified this tutorial against n8n’s current 2026 documentation, Academy material, Webhook documentation, execution/debugging docs and error-workflow guidance on September 20, 2026. This is a documentation-verified build guide; we are not claiming that this exact workflow was executed on a live n8n instance during this publishing pass. Node labels and options can change between n8n releases, so check the current UI if a label differs slightly.
What you will build
The workflow is deliberately small:
Webhook
  ↓
Edit Fields / Normalize
  ↓
Validate email?
  ├─ No → Respond 400
  └─ Yes
       ↓
     Priority = high?
       ├─ Yes → Respond 202: high-priority
       └─ No  → Respond 202: accepted
That shape teaches most of the concepts you need for larger automations: a trigger, item data, expressions, transformations, conditions, branches, and actions. Later, a Respond node can become Gmail, Slack, a CRM, Google Sheets, an API call, an AI model, or another workflow.
If you are still deciding whether to use n8n Cloud or self-host it, start with our n8n Pricing in 2026 guide. If you are comparing platforms, see n8n vs Zapier.
The n8n mental model: trigger → items → nodes → execution
Before clicking anything, understand four terms:
- Trigger: the event that starts the workflow. It can be manual, scheduled, an incoming webhook, a new email, a new database row, or another supported event.
- Item: the unit of data moving through the workflow. Most n8n nodes receive one or more items and return one or more items.
- Node: one step that reads data, changes it, makes a decision, calls a service, or returns a result.
- Execution: one run of the workflow from its trigger through the nodes that execute on that path.
n8n’s current beginner curriculum teaches these concepts before AI agents for a reason. Once you understand data flow and expressions, the same mental model applies to business automation, APIs and AI workflows.
Step 1: create a workflow from scratch
Open n8n and create a new workflow. Give it a name that describes the outcome, not the tools. We will use:
Lead Intake Router — Tutorial
For production work, naming matters more than it seems. A workspace full of “My workflow 7” and “Test copy final” becomes hard to operate long before you hit a technical limit.
Step 2: add the Webhook trigger
Select Add first step, search for Webhook, and add the Webhook node.
Use these settings:
| Setting | Value for this tutorial |
|---|---|
| HTTP Method | POST |
| Path | lead-intake or a unique tutorial path |
| Authentication | None while testing locally; secure it before real public use |
| Respond | Using “Respond to Webhook” Node |
The Webhook node is useful because it exposes the difference between development and production immediately. n8n gives the node two URLs:
- Test URL: registered while you are listening for a test event or manually executing the workflow. Incoming data appears in the editor.
- Production URL: registered when the workflow is published. Production calls appear in execution history instead of streaming into the editor canvas.
Do not build an integration against the Test URL and expect it to work permanently. This is one of the most common beginner mistakes.
Step 3: send your first test payload
In the Webhook node, select Listen for Test Event. Copy the Test URL. Then send a POST request from a terminal, API client, or another app.
Replace YOUR_TEST_URL with the URL shown by your Webhook node:
curl -X POST "YOUR_TEST_URL" \
  -H "Content-Type: application/json" \
  -d '{
    "name": "Ava Chen",
    "email": "AVA@example.com",
    "priority": "high",
    "message": "Need help with onboarding"
  }'
When the request reaches n8n, inspect the Webhook output. For a JSON POST, the request is available as structured data including body, headers, params and query. Your submitted email is therefore under the body object rather than magically becoming a top-level field.
This is the moment to learn the most useful habit in n8n: map fields from real node output instead of typing paths from memory.
Step 4: normalize safely and preserve an input-validity flag
Add an Edit Fields node after the Webhook. Depending on the n8n version, you may still see this concept referred to as Set in older tutorials.
Do not call string methods on untrusted webhook fields until you have checked their types. A payload can contain a number, object or array where you expected a string. If you run .trim() or .toLowerCase() on that value first, the workflow can fail before your validation branch gets a chance to return a controlled 400 response.
Create five output fields:
| Field | Expression | Why |
|---|---|---|
input_valid | {{ !!$json.body && typeof $json.body.email === 'string' && $json.body.email.trim() !== '' && ($json.body.priority === undefined || typeof $json.body.priority === 'string') && ($json.body.name === undefined || typeof $json.body.name === 'string') && ($json.body.message === undefined || typeof $json.body.message === 'string') }} | Rejects missing email and non-string values before string normalization can fail |
name | {{ typeof $json.body?.name === 'string' ? $json.body.name.trim() : '' }} | Normalizes an optional string without coercing objects or numbers |
email | {{ typeof $json.body?.email === 'string' ? $json.body.email.trim().toLowerCase() : '' }} | Normalizes case and whitespace only after the type check |
priority | {{ typeof $json.body?.priority === 'string' ? $json.body.priority.trim().toLowerCase() : 'normal' }} | Uses a default only when the field is absent or invalid; input_valid still records an invalid supplied type |
message | {{ typeof $json.body?.message === 'string' ? $json.body.message : '' }} | Keeps downstream nodes on a predictable string shape |
n8n expressions are wrapped in {{ ... }}. You can type them manually, but the safer beginner workflow is to drag values from the INPUT pane or use the expression editor so n8n creates the reference for you. If your n8n build does not accept optional chaining in an expression, use an equivalent explicit $json.body && typeof ... guard.
For the valid sample payload, the output should look conceptually like:
{
  "input_valid": true,
  "name": "Ava Chen",
  "email": "ava@example.com",
  "priority": "high",
  "message": "Need help with onboarding"
}
Step 5: validate before you automate
Add an If node after Edit Fields. Check {{ $json.input_valid }} and continue only when it is true.
This deliberately validates more than “email is not empty.” It prevents values such as {"email":123}, {"email":{}} or {"priority":[]} from crashing a string-normalization expression or silently entering the valid branch.
For a production intake API, extend the same pattern with email syntax checks, allowed domains, required IDs, signatures, timestamps, size limits or duplicate event IDs as your contract requires. The true output continues; the false output becomes a controlled client error.
Step 6: return a real 400 response for invalid input
On the false branch, add Respond to Webhook.
Configure a JSON response with HTTP status 400:
{
  "ok": false,
  "error": "invalid_input"
}
Why return 400 instead of a friendly 200 with an error string? Because the caller should be able to distinguish a valid request from a bad request using standard HTTP behavior. A workflow that returns 200 for every failure makes upstream monitoring and retry logic much harder.
Step 7: route high-priority requests
On the valid branch, add a second If node. Compare:
{{ $json.priority }}
to:
high
Now your workflow has two valid paths. In this tutorial we will return different responses; in a business workflow this is where you might route urgent leads to Slack, assign an owner in a CRM, create a ticket, or request human review before an expensive or irreversible action.
Step 8: respond with a structured result
Add a Respond to Webhook node on each valid branch.
For high priority, return HTTP 202 with JSON such as:
{
  "ok": true,
  "route": "high-priority",
  "email": "{{ $json.email }}"
}
For normal priority, return:
{
  "ok": true,
  "route": "standard",
  "email": "{{ $json.email }}"
}
A 202 Accepted response is a useful pattern when the caller only needs to know that the request was accepted for processing. If your workflow must complete all downstream work before replying, choose response behavior that matches that contract instead.
Step 9: test all three paths, not just the happy path
A workflow is not meaningfully tested because one green execution happened. Test at least these three cases:
| Test | Input | Expected result |
|---|---|---|
| High priority | Valid email + priority: high | 202, route = high-priority |
| Normal priority | Valid email + normal or missing priority | 202, route = standard |
| Invalid request | Missing/blank email or a non-string value such as email: 123 | 400, error = invalid_input |
You can send the invalid case with:
curl -X POST "YOUR_TEST_URL" \
  -H "Content-Type: application/json" \
  -d '{"name":"No Email","priority":"normal"}'
For more complex workflows, n8n lets you pin or mock data while developing. That is useful when a trigger is slow, rate-limited, expensive, or difficult to reproduce. The important rule is to remember that pinned development data is not a substitute for testing a real production event before launch.
Step 10: publish the workflow and switch to the Production URL
New workflows are unpublished by default. When testing is complete, select Publish. n8n then registers the production webhook.
Copy the Production URL from the Webhook node and update the external service that will call it. Do not leave a real integration pointing at the temporary Test URL.
In production, incoming data does not appear live on the canvas the way a test event does. Open the workflow’s Executions tab to inspect completed, failed, running or waiting executions.
Step 11: inspect an execution before adding more nodes
Before turning the tutorial into a larger automation, send one real request to the Production URL and inspect the execution.
- Did the request hit the expected branch?
- Did every mapped field contain the value you expected?
- Did the workflow store sensitive data you did not intend to retain?
- Was the response status and body what the caller expected?
- If the same request is sent twice, would the workflow create duplicate side effects?
n8n can retry a failed execution using the currently saved workflow or the original workflow version. That is useful for debugging, but it is not a substitute for designing idempotent actions when a retry could create duplicate emails, CRM records, charges or tickets.
Step 12: add credentials only when the workflow needs them
The core tutorial intentionally uses no external credential. When you extend it, n8n credentials are how authenticated nodes connect to Gmail, Slack, Google Sheets, databases, CRMs and APIs.
- Create the narrowest credential that can perform the required action.
- Do not paste secrets into an Edit Fields or Code node just because it is convenient.
- Do not expose credential values in webhook responses or execution logs.
- If a workflow is shared, understand which collaborators can use credentials referenced by its nodes.
If the service has no dedicated n8n node, the HTTP Request node can call its API directly and can often reuse supported credential types.
Step 13: secure the webhook before public traffic
The tutorial starts with Authentication = None so you can see the workflow work. That is not a recommendation for a real public endpoint.
n8n’s Webhook node currently supports Basic auth, Header auth and JWT auth. It also supports an IP allowlist. Which control is appropriate depends on the system calling your webhook.
A production webhook should have an explicit trust model:
- Who is allowed to call it?
- How does n8n verify the caller?
- Can the request be replayed?
- Is there a unique event ID for deduplication?
- Could a malicious payload make a later node perform an unsafe action?
For self-hosted instances, n8n also provides a security audit that can flag unprotected webhooks, risky nodes, community nodes, unused credentials and other instance-level concerns.
Step 14: create an error workflow before you forget
Create a separate workflow with Error Trigger as the first node. That workflow can send an alert, write an incident record, or notify an operator when an automatic workflow fails.
Then open the main workflow’s settings and select that error workflow.
One detail that surprises beginners: n8n documents that Error Trigger does not run when you manually execute a workflow. It is designed for failures from automatic workflow executions. Test your main workflow’s node-level failure paths manually, then verify the error workflow with an automatic execution in a safe environment.
Step 15: use retries for transient failures, not broken logic
External APIs fail. Rate limits, 429s, temporary network problems and short service outages are normal enough that production workflows need a retry strategy.
Use retry behavior for errors that may succeed on a later attempt. Do not use retries to hide permanent validation errors, missing credentials or malformed requests.
Before turning on retries for a node that creates something, ask whether the operation is idempotent. Retrying a GET is usually harmless. Retrying “charge card,” “send invoice,” or “create CRM deal” can produce duplicate side effects unless the downstream API or your workflow has a deduplication key.
Step 16: extend the workflow into something useful
Once the core workflow is working, replace or extend the two success branches.
| Goal | What to add | What to protect |
|---|---|---|
| Notify a team | Slack, Teams or email action | Avoid leaking sensitive request fields |
| Store the request | Google Sheets, Airtable, database or CRM | Deduplicate and define retention |
| Enrich a lead | HTTP Request or enrichment node | Timeouts, rate limits and cost |
| Classify with AI | Text Classifier, chain or model node | Prompt injection, confidence and human review |
| Create a task | Project-management node | Duplicate task creation on retry |
For a more realistic AI + human-review implementation, see our n8n AI Email Triage Workflow. For the broader design question of when deterministic automation is better than an agent, start with AI Automation in 2026.
Where n8n Assistant fits in 2026
n8n introduced n8n Assistant in September 2026 as a newer way to describe a workflow in natural language, let the assistant build it on the canvas, request credentials when needed, run it, and help debug failures. It supersedes the earlier AI Workflow Builder.
That does not make the concepts in this tutorial obsolete. The workflow it builds is still made of nodes, connections, credentials and executions. You still need to understand what data crosses a boundary, what a retry can duplicate, whether a webhook is authenticated, and what should require human approval.
A useful way to use the Assistant is: get a first version working, then review the workflow manually against the production checklist below.
AI-XBlog’s 12-point n8n production checklist
A workflow is ready for production when you can answer these questions clearly—not when every node is green once.
| Check | Pass condition |
|---|---|
| 1. Trigger | The production trigger is registered and the external service uses the Production URL, not the Test URL |
| 2. Authentication | Public entry points have the right auth, signature, IP or caller controls for the use case |
| 3. Input contract | Required fields and accepted values are validated before side effects |
| 4. Mapping | Expressions were mapped against real sample data, not guessed field paths |
| 5. Failure paths | Invalid input, empty results and upstream failures have defined behavior |
| 6. Retry safety | Transient failures can retry without creating duplicate irreversible actions |
| 7. Error workflow | Automatic workflow failures reach an operator or incident channel |
| 8. Credentials | Secrets use n8n credentials or an appropriate secret system and have least privilege |
| 9. Sensitive data | Execution history, logs and webhook responses do not expose unnecessary PII or secrets |
| 10. Observability | You know where to inspect production executions and what “healthy” looks like |
| 11. Cost/limits | External API, AI model and execution costs have a reasonable ceiling |
| 12. Rollback | You know how to stop the workflow and what downstream work may still be in flight |
Common n8n beginner mistakes
“My webhook worked once and then stopped”
You probably used the Test URL. Test webhooks are registered for development. Publish the workflow and configure the calling service with the Production URL.
“My expression says the field is undefined”
Inspect the previous node’s real output. A webhook JSON field may be under $json.body, while a later Edit Fields node can move it to the top level. Map from actual output rather than assuming every node returns the same shape.
“The workflow is green but it did the wrong thing”
A successful execution means nodes completed without an unhandled error. It does not prove the business result was correct. Test expected outputs, not only execution status.
“I added Continue on Error everywhere”
That can turn real failures into silent bad data. Continue only when downstream nodes know how to handle the error output or when the failed step is genuinely optional.
“I put an API key in a Set/Edit Fields node”
Move secrets into n8n credentials or an appropriate secret-management mechanism. Workflow data can appear in execution history and can be passed to later nodes.
What to learn after this tutorial
Once this workflow feels obvious, the next useful skills are:
- HTTP Request authentication and pagination
- Split Out, Aggregate, Merge and Loop Over Items
- Sub-workflows for reusable logic
- Data Tables or an external database for state
- Human approval for risky AI or business actions
- Execution retention and debugging from previous runs
- Error workflows and alerts
- AI evaluations before letting model output drive irreversible actions
For business prioritization, see AI Automation for Small Business, which uses a seven-factor scorecard to decide what is worth automating first.
Frequently asked questions
Do I need coding experience to learn n8n?
No. n8n’s current beginner curriculum assumes no prior coding experience. Basic familiarity with JSON and APIs becomes helpful as workflows get more advanced, and the Code node remains available when visual nodes are not enough.
Can I learn n8n without paying for an AI API?
Yes. The core workflow in this tutorial requires no AI model. Learn triggers, expressions, data mapping, branching and error handling first; add AI only when the task actually benefits from probabilistic reasoning or classification.
What is the difference between Execute Workflow and Publish?
Manual execution is for building and testing. Publishing makes workflows with trigger nodes run automatically when their trigger condition occurs and registers production webhooks.
Should I start with n8n Cloud or self-hosted n8n?
Either can teach the same workflow concepts. Cloud removes infrastructure work; self-hosting gives you more infrastructure responsibility and control. Compare total cost, execution model and operational requirements in our n8n pricing guide rather than choosing on software price alone.
When should I use an AI Agent instead of a normal workflow?
Use deterministic nodes when the steps and rules are known. Use an agent when the task genuinely needs model-driven reasoning, tool selection or adaptation. If an action is high-impact, add explicit permissions, guardrails and human approval rather than assuming “agentic” means “unattended.”
Bottom line
Your first n8n workflow should teach you how data moves, not impress you with how many nodes it has. Build a small trigger-to-response flow, map from real data, test invalid input, publish it, inspect the production execution, and add reliability controls before adding more integrations.
Once that mental model is solid, n8n becomes much easier to reason about: every larger workflow is still a trigger, data, decisions, actions and failure handling—just with more branches.
Primary sources
- n8n Docs: Build your first workflow
- n8n Docs: Webhook node
- n8n Docs: Webhook workflow development
- n8n Docs: Respond to Webhook node
- n8n Docs: Edit Fields (Set) node
- n8n Docs: Referencing data in the UI
- n8n Docs: All executions
- n8n Docs: Error Trigger
- n8n Docs: Pinning and mocking data
- n8n Docs: Security audit
- n8n Academy: Quickstart
- n8n: Introducing n8n Assistant
Last verified: September 20, 2026. n8n changes quickly, especially around the editor, Assistant and AI features. AI-XBlog treats this as living content and will update steps when the production workflow model or UI changes materially.
AI-XBlog Weekly Brief
Keep up with AI that actually works
Join the AI-XBlog Weekly Brief for major AI updates, practical workflows, useful tools, and editor’s picks. No daily noise.
Reader discussion
Join the discussion
Have you tried this tool or workflow? Share your experience, corrections, or questions. Useful reader feedback may help us improve this article.
All comments are reviewed before publication. Your email address will not be published. Promotional links and low-value spam are removed.